Editing your photographs is an art in itself. Technical and challenging, the process provides an opportunity to reimagine your images to align with your style and brand. It is an individual and very personal process, however learning a few simple tricks can have a great impact.
Recently I spoke with the team at Shotkit to provide an insight into the techniques I use when editing my photographs with Adobe Lightroom. Specifically we ran through the editing process of one of my favourite images – Follow | Byron Bay.
READ ON BELOW for the interview and a step by step guide on how I gave one of my all time favourite images a facelift.
__________________________________________
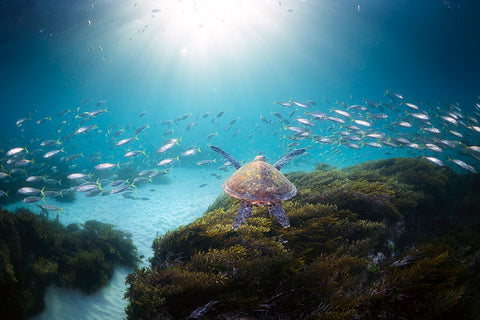
This image was captured using strobes to balance the background and foreground. The image was taken on a Sony A7R II at 1/200 sec – f/6.3 – ISO 640. This is one of my favourite underwater images.

Follow before the edit
Follow after the edit
The editing process
Step 1: Using the colour balance dropper tool, I get a sample from the water’s surface (which should be almost white). You’ll notice the water’s surface will turn magenta – to counteract this you will need to go to Step 2.
Step 3: Following this I select the clone tool, which is used to delete any artefacts such as sand particles.
Step 4: Next up is the curves tool, which I use to create an “S” curve by dropping the shadows and lifting the mid-tones. When doing this remember shadows are at the bottom left of the curves tool.
Step 5: Then I export to Photoshop where I dodge and burn the Highlights and Midtones. This makes the image pop!
Step 6: Finally, I export the file as a TIFF at 300DPI for stable archiving and future printing.